Free "On Air" Light for Business Meetings
Using Home Assistant to update lights based on meetings

Like many people in this post-pandemic world (and a lot of people pre-pandemic), my wife and I both work from home. In my role as Head of Engineering at Jobscan, I naturally have a lot of meetings every day. It can sometimes be difficult for your family members to know when they are walking by a meeting versus when they are walking by you doing normal quiet work, and letting them know that in as unobtrusive way as possible.
While there are commercial solutions to show an indicator light when your mic is hot like the mutesync, I didn’t really want to purchase anything to accomplish this. Also the mutesync is something that sits on your desk, and I wanted to be able to warn my wife before she enters my office that I’m on a call.
I recently setup Home Assistant on a Raspberry Pi 5 to start moving my smart home controls to something inside my local network instead of relying on a variety of third party apps that require going through the internet. Even Google Assistant was starting to become cumbersome due to limitations in what we can do.
After setting up Home Assistant to give me more internal control of my IoT devices, I decided to look into ways I can use Home Assistant to create something akin to an “On Air” light. The solution I came up with is working really well, and I thought I’d share with my readers what I did to accomplish this.
The first thing I needed was a virtual “Sensor” that would allow me to detect if I was on a call or not, and if my mic and/or camera were on or not. I wanted a solution that would work in both Zoom and Google Meet as I use both for meetings, and ideally I don’t want to have to worry about switching anything in order to do so.
MuteDeck Software
Fortunately, this latter thing was a problem I had already solved. Over a year ago I picked up the Mute Deck software to make it possible to set single buttons on my stream deck buttons (note: I don’t have an actual stream deck, but I do have a Corsair K100 Keyboard that has keys that are running through the Elgato stream deck software). This combo of software has given me hot keys on my keyboard that can mute or unmute my mic in any meeting software (Even if that meeting software is not the active focus window), as well as a button to turn my camera on and off.
Mutedeck also has an API endpoint that from within my network connecting to my computer’s IP on this port will return status on if I’m in an active call or not, and if my mic and video is muted or not. Simply requesting my IP on port 3491 and a path of /v1/status will return something like this
{
  "call": "active",
  "control": "zoom",
  "mute": "inactive",
  "record": "inactive",
  "share": "inactive",
  "status": 200,
  "teams_api": "disabled",
  "video": "active"
}
Now that I can programmatically know if a call is active and if my mic or camera is active, I need a way to connect this to Home Assistant as a custom sensor.
Home Assistant Sensor Configuration
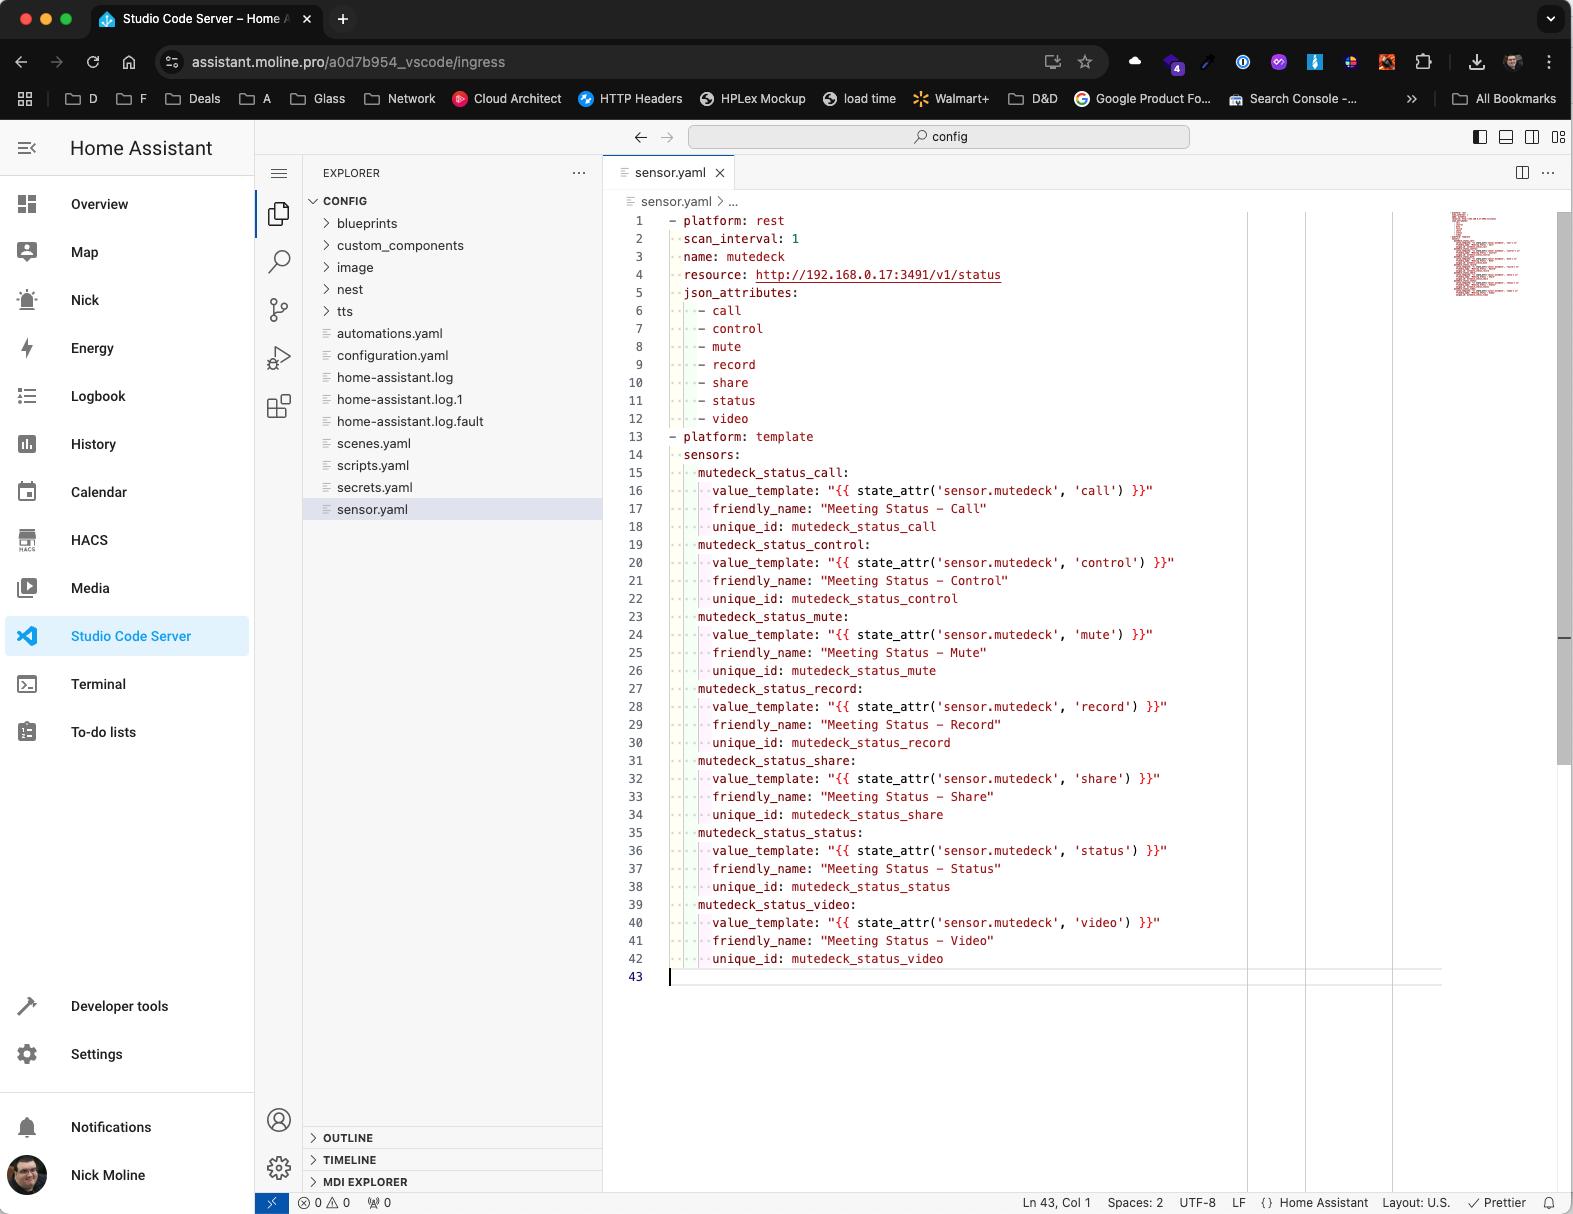
Fortunately, it seems someone at Mutedeck wanted to do the same thing because they’ve already created a sensor.yaml file that can be loaded into Home Assistant. To do this you need to either edit (or create if it doesn’t already exist) a sensor.yaml file in the root of your home assistant folder. An easy way to do this is to install the VS Code Addon for Home Assistant which makes it easy to edit yaml files in your home assistant configuration.
To install the VS Code Addon, go to Settings —> Add-ons —> Add-on store and search for “Studio Code Server” install it and then start it and you’ll get an additional navigation sidebar entry to launch the web version of VS Code pointed to the config folder of your Home Assistant.
From here if you already have a sensor.yaml file, edit it to add the entries from mutedeck’s sensor.yaml file. If the file doesn’t exist, create a new file with that name and paste in the contents of their file. Make sure to update the URL in the resource key to match your computer’s IP address. I personally also updated the friendly_name properties to say Meeting Status - instead of MuteDeck Status - as it works better for me (I might later rename it to specify Nick Meeting Status if I add in similar sensors for my wife’s calls.

If you didn’t previously have a sensor.yaml file, you’ll have to also edit your configuration.yaml file and add the following line to the end:
sensor: !include sensor.yamlOnce you have saved both files, restart your home assistant machine and you’ll note your new sensors show up in a Sensors card on the dashboard.

Excellent, now Home Assistant knows if I’m on a call or not, and if my mic and camera are on or not. There are other handy things here as well like if the call is being recorded or not and if I’m currently sharing my screen or not.
Now that Home Assistant knows my meeting status, it is time to use that information to setup some Automations.
Home Assistant Automations
I could have done this with less, but I setup 7 automation to accomplish what I wanted to do. I have these 7 automations controlling 3 different lights, one of my hall lights, a lamp here in my office, and flood light I use for video lighting in my meetings.
Join Call (Muted): Triggered when we join a call and the mic is already muted
Join Call (Hot Mic): Same but triggered if the mic is already hot when joining the call
In Call: Mute: Triggered whenever the audio is Muted
In Call: Unmute: Triggered whenever the audio is Unmuted
In Call: Camera Off: Triggered whenever the camera is turned off in a call
In Call: Camera On: Triggered whenever the camera is turned on in a call
Leave Call: Triggered when I disconnect from the call
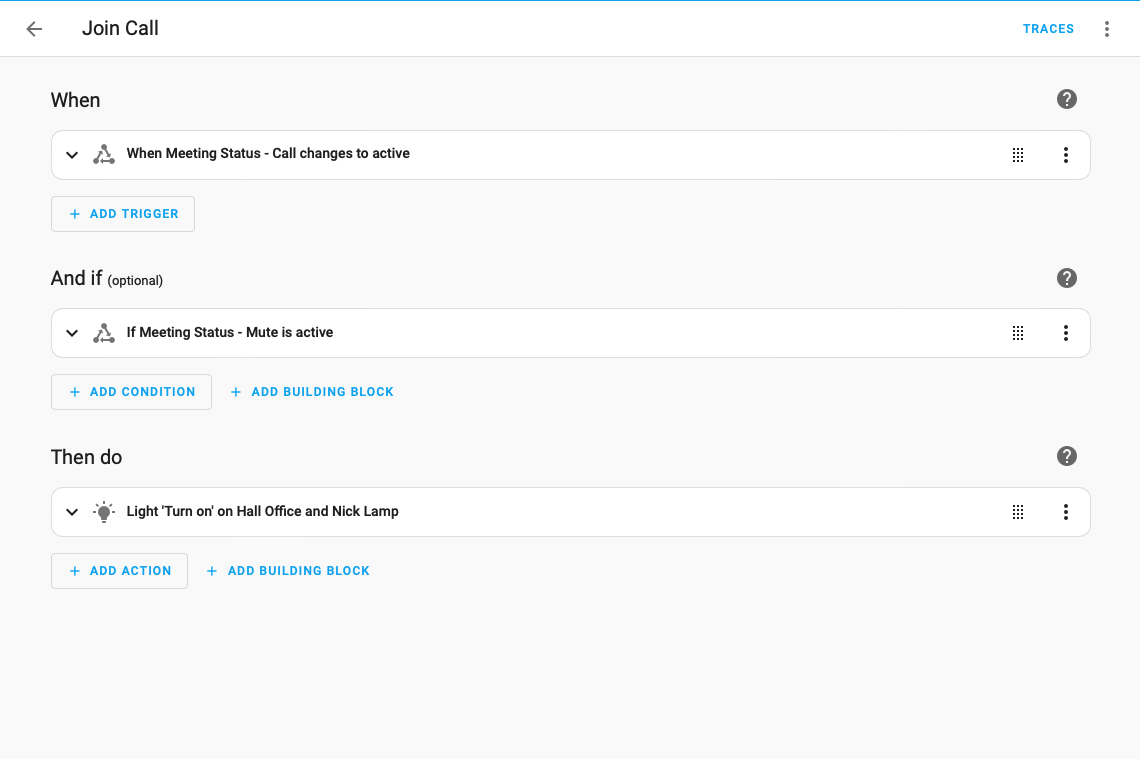
Join Call
The triggering event for both of these events is when the “Meeting Status - Call” entity value changes to “active” from any other state.

I also added a conditional (this conditional is the only thing difference between the 2 automations) that checks if the “Meeting Status - Mute” entity is set to “active” or “inactive” (note Mutedeck made this entity to track “Mute” not “Audio” so “active” means the mic is not on, while “inactive” means the mic is on).
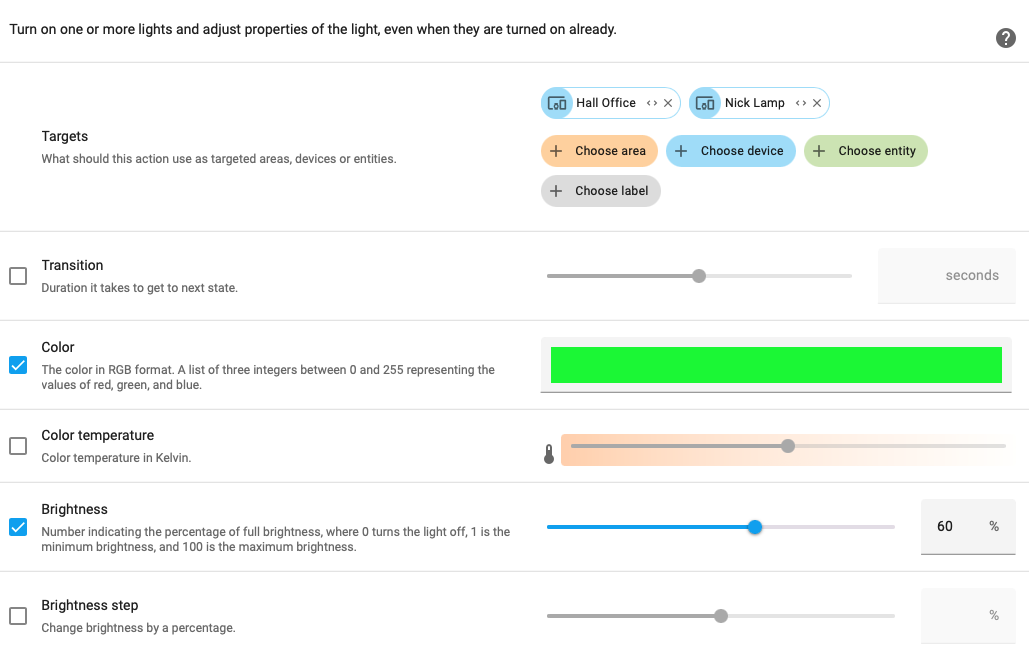
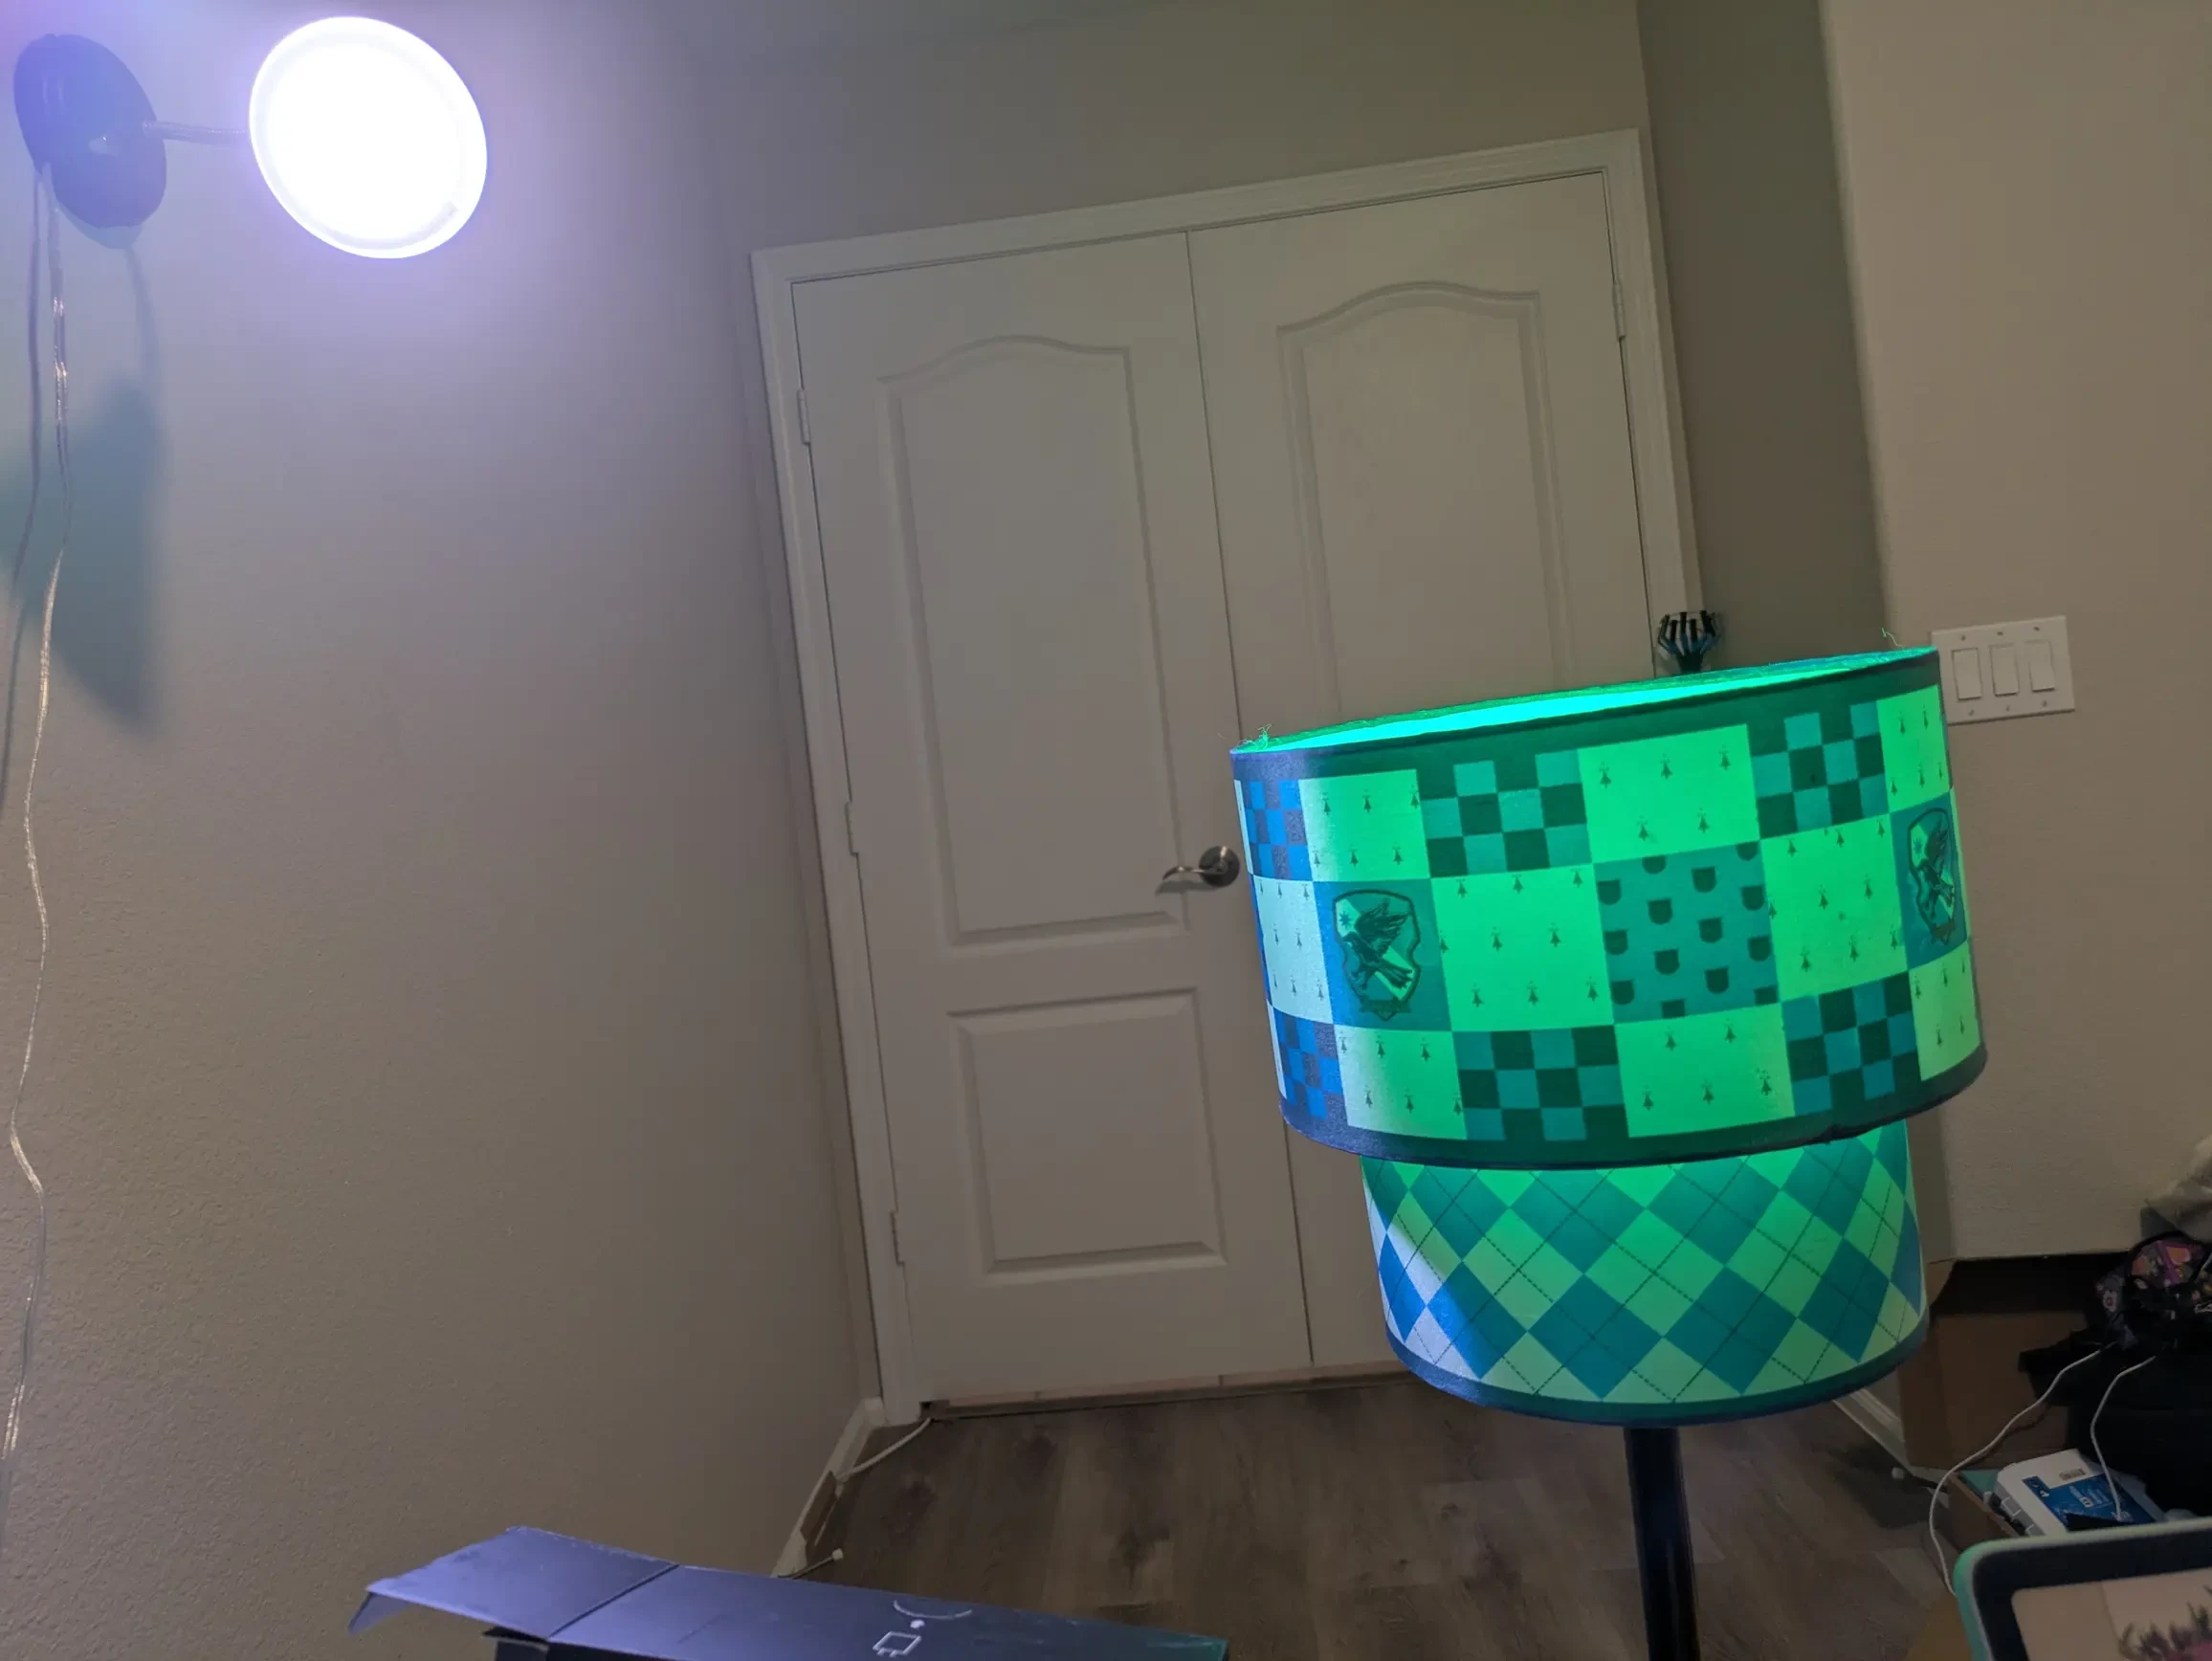
For the action, I have it turn 2 lights (the lamp on my desk and the light in the hallway) on and sets the color to Green if the mic is muted, and red if the mic is not muted.

The Lamp on my desk is mostly for me knowing what the light out in the hall currently has.
In Call: Mute/Unmute
These automations are set up the opposite way as the Join Call automation. We now track the “Meeting Status - Mute” entity changing between “active” and “inactive” and switching the color between red and green accordingly. The “And If” conditional on these is set to make sure the “Meeting Status - Call” entity status is still active, so it doesn’t trigger if my mic is muted/unmuted when I’m not in a meeting.
In Call: Camera On/Off
This pair of automations is similar to the above, except that it tracks the “Meeting Status - Video” entity. For this one I have it turn my video flood light on full brightness when my camera is on, and off when my camera is off. This way I only have video lighting on when my camera is actually active.

Leave Call
The final automation is setup to track when “Meeting Status - Call” changes to “inactive” when this status changes, the video flood light and the lamp turn off, and the light in the hallway switches to white.
Keeping my Wife in the Know
Now my wife knows if the light in the hall outside my office is off or white, I’m not currently in a call, if it is green I’m in a call but my mic is currently muted, and if it is red my mic is currently active and if she were to say something, my colleagues can hear her. If she does walk into my office when I’m on a call, she can also know if my camera is active if my flood light is on or not.
All of this was accomplished without spending any extra money, though Mute Deck is not free software so if I didn’t already have that software I would have had to pay for it or find different software to return my call status. Also it goes without saying that I already had the smart lights (they are TP-Link Kasa smart lights).
I’ve been quite happy with the results of my setup, and I’ll be setting up something similar for my wife so I can also know when she’s on a meeting or not.